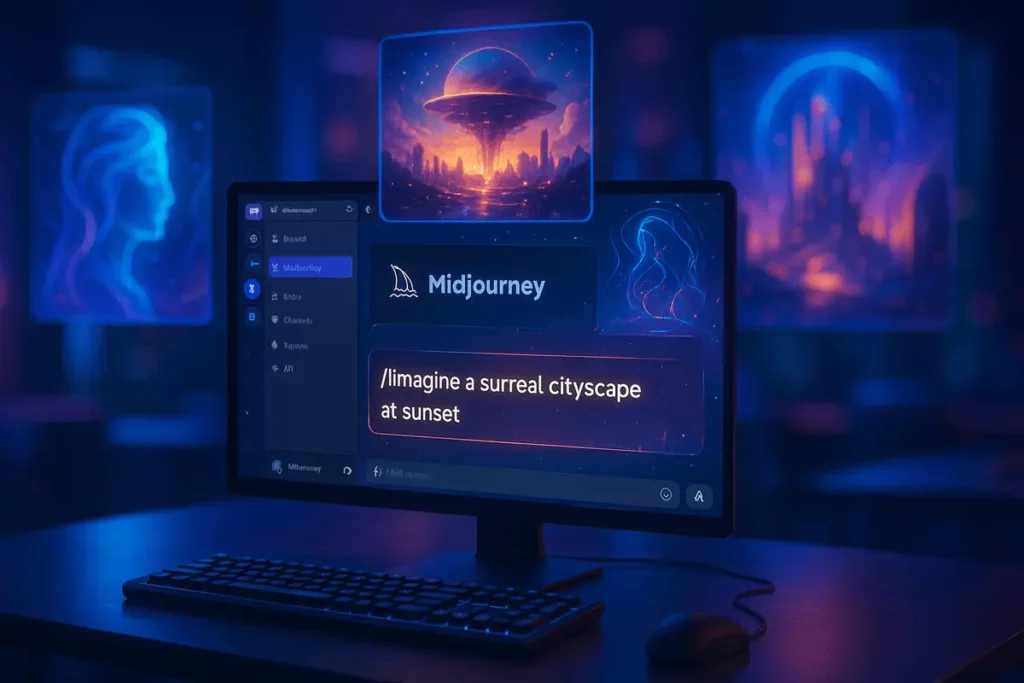
In the ever-changing world of AI-generated art, Midjourney is regarded as one of the more effective and innovative tools available. If you’re an artist, designer, or enjoy playing with digital art, Midjourney allows you to create distinctive, detailed and high-quality photos directly from text-based instructions.
If you’re brand new to AI art, you may be wondering: How Do I Create an Image in Midjourney? This guide guides you through every step from establishing your account, through mastering the commands and understanding advanced parameters, so that you can begin creating professional-quality images within a matter of minutes.
What Is Midjourney?
Midjourney is an AI tool for creating images that transforms text-based prompts into stunning photos. It utilises advanced machine learning models that are trained over millions of pictures and styles to interpret written instructions creatively.
Contrary to the other AI tools for art, Midjourney is a tool that focuses on the artistic aspect and stylised imagination, creating outcomes that can resemble conceptual art, digital paintings or cinematic images. It is particularly popular with marketers, designers and game developers.
How Do I Create an Image in Midjourney: Step-by-Step Guide

Step 1: Join the Midjourney Discord Server
Midjourney is entirely operated through Discord, a platform for communication widely used by creators and communities.
To begin:
- Visit https://www.midjourney.com
- Select “Join the Beta”, and this will connect you to the Midjourney Discord server.
- Accept the invitation and log in or make an account on Discord in case you don’t have one.
After joining, you’ll have access to channels where you can create images and connect with other members.

Step 2: Subscribe to a Midjourney Plan
Midjourney requires a membership to create images above the trial period of free (if there is one).
To subscribe:
- Visit https://www.midjourney.com/account.
- Select a plan that meets your needs. Options generally range from basic to Pro based on your generation speed as well as use volume.
- Once you’ve signed up, log in to Discord. Discord server to begin creating.
Step 3: Access a “Newbie” or Personal Channel
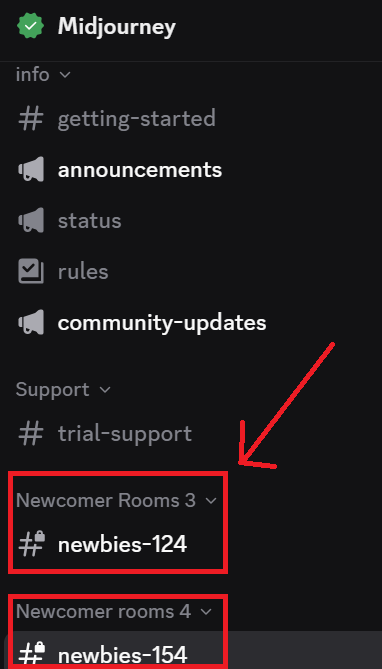
In the Midjourney Discord, you’ll find various channels, including #newbies-1, #newbies-2, #newbies-3, etc. These channels are specifically designed for those who are just beginning to learn about the art of creating images.
If you’re using a pay plan, you may also make use of MidJourney Bot within Your Private Server as well as the direct message feature, which provides an even more private space.
Step 4: Use the /imagine Command

This is the core command you’ll use to generate images.
In any Midjourney Bot channel, type:
/imagine prompt: your description here
Example:
/imagine prompt: a futuristic city skyline at sunset, cyberpunk style, glowing neon lights, cinematic composition
Once you hit Enter, Midjourney starts processing your request. In about 60 seconds, it will display four image variations based on your prompt.
Step 5: Upscale or Create Variations
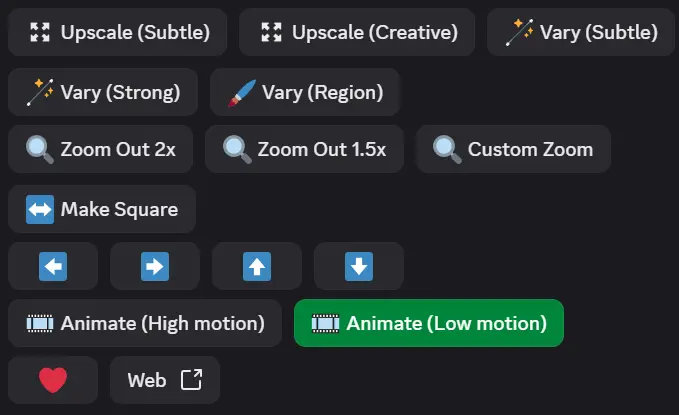
When your images are completed, there will be a variety of buttons.
- U1-U4: Increase the resolution of one image to increase clarity and detail.
- V1-V4: Make new versions of a specific image.
- (Re-roll): Re-roll all four images using the same prompt, resulting in different outcomes.
Images that have been upscaled are great to share, print or further edit using design programs.
Step 6: Download Your Image
For downloading an image, click here:
- Click on the image that is upscaled to view it in its full size.
- Right-click and choose “Save image as…” to save on your device.
Now you have your first AI-generated image created by Midjourney.
How to Write Effective Midjourney Prompts
The ability to create stunning images with Midjourney is mainly dependent on how you define the things you’d like to see. Writing a well crafted prompt can help the AI clearly discern your intentions.
Here’s how to arrange it:
1. Be Descriptive
Include subject, style, mood, environment and the colour scheme.
Example:
“Ancient temple in a misty forest, cinematic lighting, moss-covered stones, high realism, 4K detail.”
2. Add Artistic Styles
You can refer to the following art movements, media or styles:
“portrait of a woman in the style of impressionism,”
“digital painting,” or
“3D render with volumetric lighting.”
3. Use Parameters
Midjourney supports prompt parameters to refine outputs. Common ones include:
| Parameter | Function | Example |
|---|---|---|
--ar | Aspect ratio | --ar 16:9 for widescreen |
--v | Model version | --v 6 |
--q | Quality level | --q 2 for higher detail |
--stylize | Artistic creativity level | --stylize 700 for more stylization |
4. Keep Iterating
Don’t expect perfection on your first try. Adjust details, styles, and parameters until you find the look you want.
Advanced Tips for Better Midjourney Images
- Combine Multiple Concepts: Merge unrelated ideas to produce unique results.
- Example: “A samurai astronaut walking on Mars, painted in ukiyo-e style.”
- Control Lighting & Composition: Use terms like soft lighting, rule of thirds, bokeh background, or wide-angle shot for professional visual effects.
- Reference Famous Artists: Try “in the style of H.R. Giger,” “by Claude Monet,” or “digital art inspired by Beeple” for stylised influences.
- Explore Remix Mode: This lets you slightly alter prompts to evolve your images creatively without starting from scratch.
- Use Image Prompts: You can also upload an image and reference it using its URL to guide the AI’s composition and tone.
Common Mistakes to Avoid
- Too Vague Prompts: “A nice picture” won’t produce beneficial results.
- Contradictory Instructions: Avoid mixing styles that conflict (e.g., “cartoon, realistic oil painting”).
- Ignoring Aspect Ratios: Always define –ar for banners, posters, or wallpapers.
- Overusing Stylisation: While stylised results look beautiful, too high stylisation values can distort realism.
Benefits of Using Midjourney
- Unlimited Creativity: Turn abstract ideas into vivid visuals.
- No Artistic Skills Needed: Text-based instructions do all the work.
- Fast Output: Generate complex imagery in under a minute.
- Versatile Use: Ideal for marketing visuals, concept art, website graphics, or social media content.
Final Thoughts
The process of making images with Midjourney is easy and endlessly creative. With a few descriptive words, you can make your imagination work into art that’s vibrant and professional.
Begin with the basics, explore through options, then refine your concepts as you play with more advanced features like aspect ratios and also stylisation. When you’re willing to work, you’ll be able to create amazing AI artwork that reflects your creativity and vision.
Midjourney isn’t just an AI tool. It’s a means to create visual storytelling, which allows anyone to create whatever they want.
FAQs About How to Create an Image in Midjourney?
1. Do I need any software to use Midjourney?
No, Midjourney runs entirely through Discord, so you only need a Discord account and a subscription plan.
2. Can I use Midjourney images commercially?
Yes, but only if your subscription tier includes commercial usage rights. Check your plan’s terms before using images for business purposes.
3. How do I make my images more realistic?
Use descriptive prompts with photography-related keywords like realistic lighting, depth of field, 35mm lens, or HDR photography.
4. Is there a way to edit images in Midjourney?
You can use variations, remix mode, or external software (like Photoshop) for additional editing. Midjourney itself focuses on generation, not post-processing.
5. What’s the difference between upscaling and variation?
Upscaling enhances resolution and adds fine details, while variation creates new versions of a specific image with slight differences.
6. How long does it take to generate an image?
Typically under 60 seconds, though it may vary depending on server load and your plan’s speed setting.
7. Can I upload an image as a reference?
Yes. Use the image’s Discord link or direct upload before your /imagine command to influence style or composition.
Also Read –