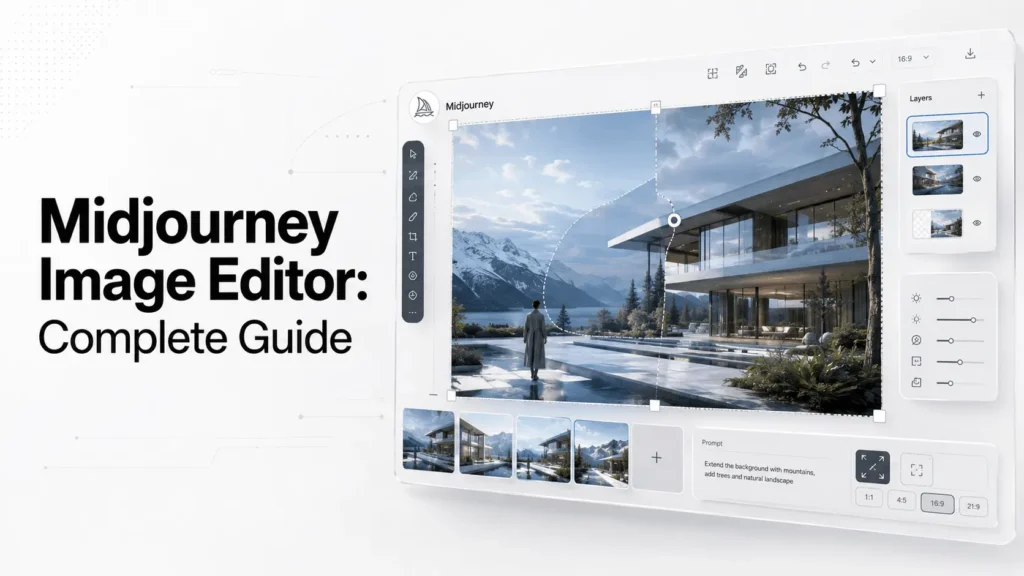
Midjourney is no longer limited to generating an image from a prompt and leaving the rest to chance. The Midjourney Image Editor gives creators a dedicated workspace for modifying images, extending canvases, replacing selected areas, adding layers, changing aspect ratios, and retexturing existing artwork.
The Editor is available through Midjourney’s website and can work with both Midjourney-generated images and external images. It combines tools such as Erase, Restore, Smart Select, Move/Resize, Layers, Retexture, Pan, Zoom Out, Remix, and Vary Region into a single editing workflow.
Midjourney’s current default model is V8.2, and inpainting and outpainting in the Editor use the newer Edit Model for V8.x images.
This guide explains how the Midjourney Image Editor works, what every major tool does, how to edit your own images, and how to get better results without repeatedly regenerating an entire image.
Quick Summary
The Midjourney Image Editor gives creators more control over AI-generated and uploaded images through powerful editing tools.
- Edit and replace specific areas with AI
- Remove objects using Erase and Smart Select
- Expand images with Pan and Zoom Out
- Combine visuals using Layers
- Transform overall styles with Retexture
- Change aspect ratios and canvas dimensions
- Use Remix for more controlled variations
- Ideal for creators, designers, marketers, and AI artists
- The latest V8.x Editor continues to expand Midjourney’s AI-powered editing capabilities
What is the Midjourney Image Editor?
The Midjourney Image Editor is a web-based editing workspace that allows users to modify existing images using a combination of traditional canvas controls and AI-powered generation.
Unlike a basic crop or adjustment tool, the Editor can regenerate selected portions of an image based on a text prompt.
You can use it to:
- Remove unwanted objects
- Replace parts of an image
- Expand an image beyond its original borders
- Change the aspect ratio
- Add new visual elements
- Combine multiple images
- Restore erased areas
- Retexture an entire image
- Remix an existing creation
- Generate variations of edited areas
The Editor can be opened from Midjourney’s Edit section on the website. Images created in Midjourney can also be opened through the creation interface.
Why Is the Editor Important?
The biggest advantage is control.
Instead of generating ten new images because one small detail is wrong, you can preserve the parts you like and ask Midjourney to regenerate only the area that needs changing.
That makes the workflow closer to AI-assisted image editing than traditional text-to-image generation.
What Can You Do With the Midjourney Image Editor?
The Editor combines several capabilities into one workspace.
| Tool | Main Purpose | Best Use |
|---|---|---|
| Move / Resize | Reposition, scale, rotate and resize the canvas | Composition changes |
| Erase | Remove an area and regenerate it | Object replacement |
| Restore | Bring back erased areas | Correcting selections |
| Smart Select | Automatically select objects or regions | Faster masking |
| Layers | Add additional images | Compositing |
| Retexture | Regenerate the image with a new visual treatment | Style transformation |
| Pan | Extend the image in a direction | Expanding composition |
| Zoom Out | Generate more surrounding content | Wider scenes |
| Remix | Modify the prompt during variations and edits | Controlled iteration |
Many of these tools can be combined rather than used independently, which is one of the Editor’s biggest strengths.
How to Access the Midjourney Editor?
The simplest route is through midjourney.com.
From the website, open the Edit page to access the full Editor. Midjourney also provides a lighter Editor experience when editing an image directly from the Create or Organize pages.
Full Editor vs Light Editor
The full Editor is designed for more advanced editing.
It provides access to tools such as:
- Canvas resizing
- Painting and erasing
- Smart Select
- Layers
- Retexture
- External image uploads
The lighter version keeps you closer to your creation feed and is useful when making quick changes to an existing Midjourney image.
How to Use the Midjourney Image Editor?
The basic workflow is straightforward.
Step 1: Choose an Image
Open an existing Midjourney image or upload your own image through the Edit page.
Midjourney’s Editor supports both Midjourney creations and external images.
Step 2: Adjust the Canvas
Use Move/Resize to reposition the image, scale it, rotate it, or change its aspect ratio.
You can use preset ratios or manually adjust the canvas boundaries.
Step 3: Select What You Want to Change
Use the Erase brush if you want to manually identify an area.
For more automated selection, use Smart Select.
Step 4: Describe the Replacement
Enter a prompt describing what you want Midjourney to generate in the selected area.
For example:
replace the empty wall with a large minimalist abstract painting in muted blue and gray tones
Step 5: Submit the Edit
Midjourney generates four results in the results panel. You can continue editing from there or export the result.
What Does the Erase Tool Do?
The Erase tool lets you mark an area that you want Midjourney to regenerate.
This is effectively an AI-assisted inpainting workflow.
Suppose you have a portrait where the subject’s clothing looks wrong.
Instead of regenerating the entire portrait, you can erase the clothing area and describe the replacement.
For example:
tailored dark navy blazer, realistic fabric texture, professional editorial photography
The rest of the image can remain intact while Midjourney works on the selected area.
Erase vs Restore
The Editor provides both Erase and Restore brushes.
- Erase: marks areas for regeneration.
- Restore: brings portions of the original image back after they have been erased.
Brush size can also be adjusted for more precise selections.
This is particularly useful when the selection needs several rounds of refinement.
How Does Smart Select Work?
Smart Select is designed to make selecting objects faster.
Instead of manually painting around every edge, you click an object or region and Midjourney creates a selection mask.
You can then refine the selection using positive and negative points.
The Editor provides two main actions:
- Erase Selection — removes the selected area.
- Erase Background — removes everything outside the selected area.
The selection needs to be applied before submitting the edit; simply seeing the highlighted mask does not mean it has already been erased.
When Should You Use Smart Select?
Smart Select works particularly well when you need to isolate:
- People
- Animals
- Products
- Vehicles
- Large foreground objects
- Distinct background areas
For tiny or complicated details, manual erasing can provide more control.
How Does Midjourney Outpainting Work?
Outpainting means extending an image beyond its existing boundaries.
Midjourney can do this through tools such as Pan and Zoom Out.
Pan
Pan extends the canvas in a specific direction.
For example, imagine you generated a portrait that looks great but is too narrow for a website banner.
You can extend the canvas horizontally and ask Midjourney to generate additional surroundings.
Midjourney describes Pan as a way to expand the canvas in a specific direction while changing the aspect ratio.
Zoom Out
Zoom Out generates additional content around an existing image.
This is useful when the original framing feels too tight.
For example:
Original: close-up portrait
Zoom Out: waist-up portrait with a studio environment
Further Zoom Out: full-body portrait within a larger scene
The important distinction is that you’re asking Midjourney to infer what should exist outside the original frame.
What Is Retexture in Midjourney?
Retexture is designed for changing the overall visual treatment of an image while retaining its broader composition.
Unlike a localized erase operation, Retexture can be applied to the entire image.
For example, you could take an existing photograph-like image and prompt:
minimalist watercolor illustration, soft paper texture, muted blue-gray palette
Midjourney can then reinterpret the image using that visual direction.
Retexture vs Inpainting
These tools solve different problems.
Use inpainting/Erase when:
- One object is wrong.
- A face needs modification.
- A background element needs replacing.
- You want to add something to a specific location.
Use Retexture when:
- You want to change the overall aesthetic.
- You want to transform the visual medium.
- You want the entire image to receive a new treatment.
This distinction can save a lot of unnecessary regeneration.
How Do Layers Work in the Midjourney Editor?
Layers allow you to bring multiple images into the same composition.
You can add another image as a new layer, move and scale it, and then use the Editor’s selection and erase tools on that layer.
For example, imagine you have:
Layer 1: a generated city background
Layer 2: a character image
Layer 3: a product image
You can position these elements independently before asking Midjourney to regenerate transparent areas.
This makes Layers useful for:
- Concept art
- Creative composites
- Product concepts
- Poster designs
- Editorial artwork
- Visual experiments
When a layered edit is submitted, Midjourney regenerates areas with visible transparency while preserving visible portions. Retexture can instead be used when the goal is to regenerate the entire image cohesively.
How to Change the Aspect Ratio in Midjourney Editor?
One of the simplest but most useful Editor functions is canvas resizing.
You can change the image’s framing for different destinations without starting over.
For example:
| Original Use | Possible Adjustment |
|---|---|
| Square artwork | Instagram post |
| Portrait image | Social media graphic |
| Landscape image | Website hero |
| Wide artwork | YouTube thumbnail |
| Vertical artwork | Mobile content |
The Move / Resize tool allows you to change the aspect ratio using presets or by dragging the canvas boundaries.
This is especially useful for marketers who often need the same creative concept in multiple formats.
How Does Remix Work With the Editor?
Remix lets you change the prompt while creating variations or making other edits.
For example, you might start with:
modern glass office overlooking a city
Then Remix the concept into:
modern glass office overlooking a coastal city at sunset
The image becomes a starting point rather than a finished endpoint.
On the website, Remix can work alongside the Editor, allowing you to modify the prompt while combining tools such as Pan, Zoom Out, and Vary Region.
This creates a useful iterative workflow:
Generate → Remix → Edit → Extend → Retexture → Export
Midjourney Image Editor vs Vary Region
These features are closely related, but they are not identical in workflow.
Vary Region is designed for selecting part of an image and regenerating that area.
The Editor brings that capability into a larger workspace alongside canvas manipulation, layers, Retexture, and other tools.
As of the current documentation, Vary Region is available for V8.2 SD images in Discord, while the web Editor provides the broader editing environment.
For quick localized changes, Vary Region can be convenient.
For more complex editing, the full Editor is generally more useful.
Midjourney Editor vs Traditional Image Editors
The Midjourney Editor should not be viewed as a complete replacement for Photoshop or other professional image-editing software.
The fundamental difference is the editing mechanism.
| Capability | Midjourney Editor | Traditional Editor |
|---|---|---|
| AI-generated replacement | Yes | Usually requires AI-specific tools |
| Text-to-image editing | Yes | Varies |
| Layers | Yes | Yes |
| Precise pixel manipulation | Limited | Strong |
| Manual brush control | Basic | Advanced |
| AI outpainting | Yes | Depends on software |
| Generative retexturing | Yes | Depends on software |
| Professional color correction | Limited | Strong |
| Complex compositing | Moderate | Advanced |
| Rapid creative exploration | Excellent | Depends on workflow |
The Midjourney Editor’s advantage is generative flexibility.
Traditional editors are generally better when exact control matters.
A professional workflow can use both: Midjourney for generative exploration and a conventional editor for final production work.
What Images Can You Edit With Midjourney?
The Editor is not limited to images originally generated by Midjourney.
Midjourney’s documentation states that the web Editor can edit both Midjourney images and users’ own images.
That makes it useful for workflows such as:
- Editing personal photographs
- Exploring product concepts
- Reworking existing artwork
- Changing backgrounds
- Creating alternative compositions
- Testing visual styles
However, users should consider ownership, consent, copyright, publicity rights, trademarks, and other applicable rules when editing images belonging to other people or organizations.
Midjourney Image Editor for Marketing
The Editor can be particularly useful for marketers because a single visual can be adapted into multiple campaign formats.
Imagine creating a product campaign in a wide format.
You could then:
- Expand or crop the composition.
- Replace the background.
- Create a portrait version.
- Remove unwanted elements.
- Add visual space around the product.
- Retexture the scene for another campaign.
- Export multiple variations.
This reduces the need to generate an entirely new image for every placement.
Midjourney Editor for Social Media
Social media often requires different aspect ratios and compositions.
Instead of generating separate images from scratch, creators can use the Editor to adapt a successful composition.
For example:
Website: 16:9
Instagram: 4:5
Story/Reel: 9:16
Square post: 1:1
The important part is to preserve the visual subject while allowing Midjourney to generate the missing environment.
This is where Pan and canvas resizing become especially useful.
Midjourney Editor for Product Images
Product visualization is another practical use case.
Suppose you have a product against a simple background but need:
- A luxury studio environment
- A seasonal campaign background
- More space around the product
- A different visual mood
- A wider banner composition
You can use selection, layers, canvas expansion, and generative editing rather than rebuilding the entire concept.
For commercial work, however, carefully check whether the generated result accurately represents the real product. AI-generated modifications can unintentionally change product dimensions, materials, logos, packaging, or other details.
How to Get Better Results With Midjourney Image Editing?
The Editor is powerful, but the prompt still matters.
1. Describe the Desired Result
Don’t simply write:
fix this
Instead, describe what should replace the selected area.
For example:
clean modern office interior, floor-to-ceiling windows, soft natural daylight, realistic architectural photography
2. Keep Local Edits Contextual
If you are replacing a background, mention the lighting and perspective of the existing image.
For example:
continue the existing warm evening lighting, realistic urban street behind the subject
This helps the new content fit the original environment.
3. Avoid Over-Erasing
If you erase too much, Midjourney has less visual information to preserve.
Start with the smallest practical selection.
You can always make another edit.
4. Use Smart Select for Large Objects
Smart Select can speed up selection when the object is visually distinct.
For complicated edges, refine the selection before submitting it.
5. Use Retexture for Global Changes
If the entire image needs a new aesthetic, don’t manually erase dozens of areas.
Retexture is designed for this type of transformation.
6. Generate Multiple Attempts
AI editing is probabilistic.
The first result may not be the strongest.
Use the results panel to compare alternatives and continue editing the best candidate.
What Are the Limitations of the Midjourney Image Editor?
The Editor is powerful, but it has several limitations.
Exact Editing Is Not Guaranteed
AI regeneration can introduce changes that you did not explicitly request.
A replacement object may have slightly different geometry, lighting, or proportions.
Fine Details Can Be Difficult
Small elements such as tiny text, intricate logos, fingers, jewelry, and product markings may require multiple attempts.
AI Can Change Important Details
When editing photographs of real products or people, inspect the output carefully.
A successful-looking edit may still alter:
- Facial details
- Product dimensions
- Text
- Logos
- Clothing
- Materials
- Object geometry
Resolution Considerations
Midjourney’s current V8.1 and V8.2 models support HD generation, but Midjourney notes that using inpainting or outpainting tools such as Pan, Zoom Out, Edit/Vary Region on HD images can downscale the resulting image to SD; the result can subsequently be upscaled.
This matters when preparing final assets for large-format use.
Some Features Differ Between Web and Discord
The Midjourney website and Discord do not expose exactly the same editing workflow.
Midjourney specifically identifies the Editor as a web-exclusive tool, while Discord provides individual tools such as Vary Region and Pan.
Midjourney Image Editor: Web vs Discord
For editing specifically, the website is the more complete environment.
| Feature | Midjourney Web | Discord |
|---|---|---|
| Full Editor | Yes | No |
| External image editing | Yes | No full Editor |
| Layers | Yes | No full Editor |
| Smart Select | Yes | No full Editor |
| Retexture | Yes | Limited/different workflow |
| Pan | Yes | Yes |
| Zoom Out | Yes | Yes |
| Vary Region | Integrated | Yes |
| Remix | Yes | Yes |
| Personalization management | Yes | More limited |
| Organizing creations | Yes | More limited |
Midjourney’s current documentation explicitly describes the Editor as a web-exclusive tool.
For someone primarily interested in AI image editing, starting on midjourney.com makes more sense than relying exclusively on Discord.
Is the Midjourney Image Editor Free?
The Editor is part of Midjourney’s membership ecosystem rather than being a separate standalone image-editing subscription.
Midjourney has also expanded access to its external image editor across membership tiers. In an April 23, 2025 announcement, the company said the external image editor was opened to all membership tiers.
Because Midjourney’s subscription structure and feature availability can change, users should check the current official plans before subscribing.
What Is New About the Midjourney Editor in V8?
The Editor has evolved considerably since its earlier V7-era implementation.
The current documentation states that inpainting and outpainting now use the new Edit Model for V8.x.
That is an important distinction for readers following older Midjourney tutorials.
Older guides may describe workflows based on V6.1 or V7. Those tutorials can still explain the basic editing concepts, but the underlying model and feature compatibility have changed.
Midjourney V7 introduced major improvements to its image model and Editor experience in 2025, including improved Editor UI, Smart Segmentation, and easier access to Vary and Upscale controls.
The current V8.x Editor is therefore best understood as an evolving system rather than a fixed V7-era feature.
A Practical Midjourney Editing Workflow
For most projects, this workflow is a good starting point:
Step 1: Generate Your Base Image
Start with the strongest possible composition.
Step 2: Identify the Problem
Don’t immediately regenerate the entire image.
Ask:
What exactly needs to change?
Step 3: Choose the Right Tool
- Wrong object → Erase
- Object selection → Smart Select
- Need original area back → Restore
- Need wider composition → Pan
- Need more surrounding space → Zoom Out
- Need new visual treatment → Retexture
- Need multiple images together → Layers
- Need prompt-based iteration → Remix
Step 4: Make the Smallest Useful Edit
Preserve as much of the successful image as possible.
Step 5: Compare Results
Review the generated options rather than accepting the first result automatically.
Step 6: Repeat Only Where Necessary
AI editing works best as an iterative process.
Final Verdict – A Complete Midjourney Image Editor Guide
The Midjourney Image Editor turns Midjourney into a more complete AI-powered creative workspace. Instead of regenerating an entire image, you can preserve what works and edit specific areas.
Use Erase and Smart Select for targeted changes, Pan and Zoom Out to expand compositions, Layers to combine visuals, and Retexture to transform the overall style.
As of August 2026, the Editor uses Midjourney’s newer V8.x Edit Model, making it a powerful tool for creators, designers, and marketers who want greater control over their AI-generated images.
Frequently Asked Questions (FAQs)
1. What is the Midjourney Image Editor?
The Midjourney Image Editor is a web-based workspace for modifying Midjourney and external images using AI-powered editing tools such as Erase, Smart Select, Layers, Retexture, Pan, Zoom Out, and Remix.
2. Can I edit my own photos in Midjourney?
Yes. Midjourney’s web Editor supports external images as well as images created within Midjourney.
3. Can Midjourney remove objects from an image?
Yes. You can use the Erase tool or Smart Select to identify an area and then ask Midjourney to regenerate it. Smart Select can also select an object or background automatically.
4. Can Midjourney change an image’s aspect ratio?
Yes. The Editor’s Move / Resize tool allows you to change the canvas size and aspect ratio using presets or manual resizing.
5. What is Midjourney Retexture?
Retexture is an editing feature that applies a new visual treatment to an image based on a text prompt. Unlike localized inpainting, it can be used to reinterpret the entire image.
6. Is Midjourney Editor available on Discord?
The full Editor is a web-exclusive Midjourney feature. Discord provides individual tools such as Pan, Remix, and Vary Region, but not the same all-in-one Editor interface.
Also Read –
Midjourney Prompts Explained: The Secret to Perfect AI Art
MidJourney Discord Setup Guide for New Users (Step-by-Step 2026)
Ultimate Midjourney V7 Guide: Master the Next Gen of AI Art
What are the best MidJourney Alternatives in 2026 (Free & Paid)